


NiuClaw Email Configuration Guide (Step-by-step with images for beginners)
Goal: Add an email account so the assistant can read and write emails.
Path:Settings → Email
Important: For the password field, enter authorization code(app-specific password), not the email web login password.
Step 1: Open the “Email” settings
- In the lower-left corner of the main interface, click Settings(gear), or press Ctrl+,
- In the settings left menu, click Email(Do not click “IM Bot”)
The correct interface is as follows: on the left, Email is selected; on the right is the email account list or an empty state.
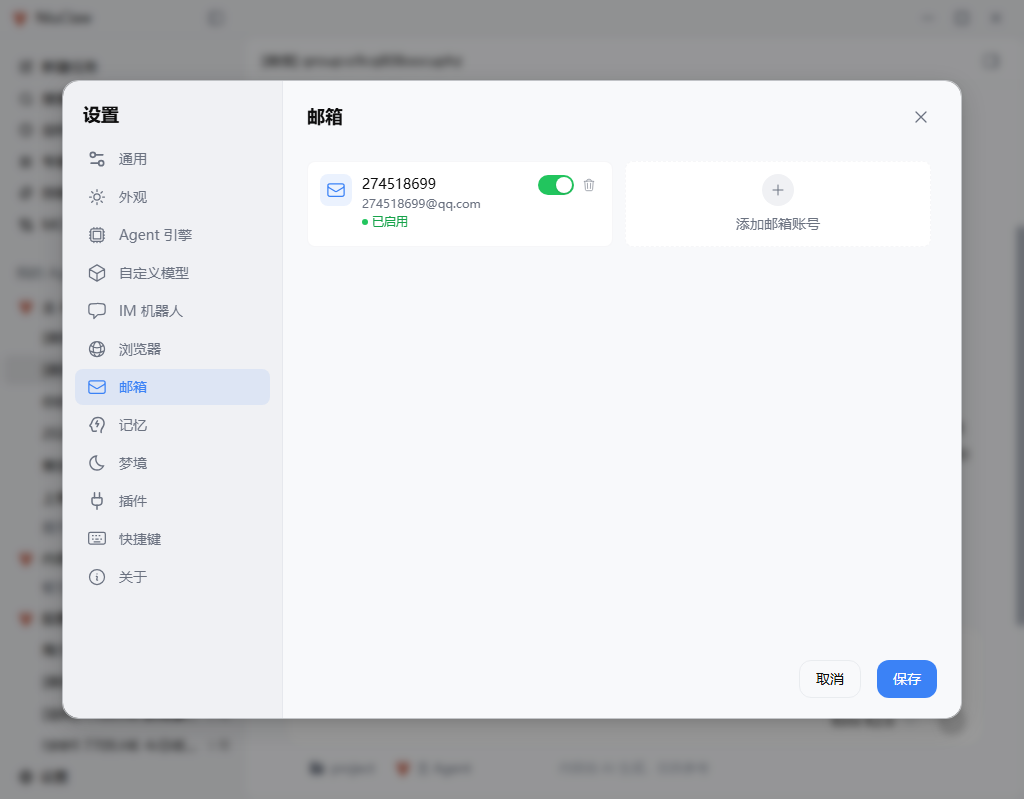
If there is already an account in the list, you can click into it to continue editing; if not, click Add Email Account。
Step 2: Fill in account information (using QQ Mail as an example)
After opening an account or clicking “Add Email Account”, fill in:
- Account name: choose any name that is easy to identify (such as a QQ number)
- Email provider: select QQ Mail(same for 163/126/Gmail/Outlook/custom)
- Email address: full address, e.g.
xxx@qq.com - authorization code: the authorization code generated after enabling IMAP/SMTP on the web,not the login password
The page usually provides a prompt: “How to enable IMAP/SMTP and get an authorization code”.
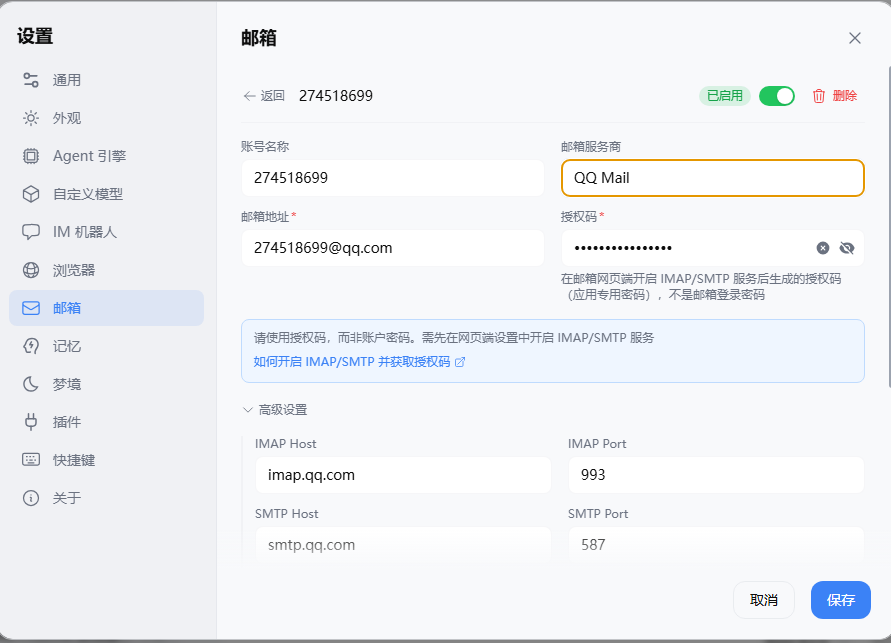
After selecting the provider, the server address under Advanced is usually filled in automatically (see the next step for a QQ example).
Step 3: Check advanced settings and test connectivity
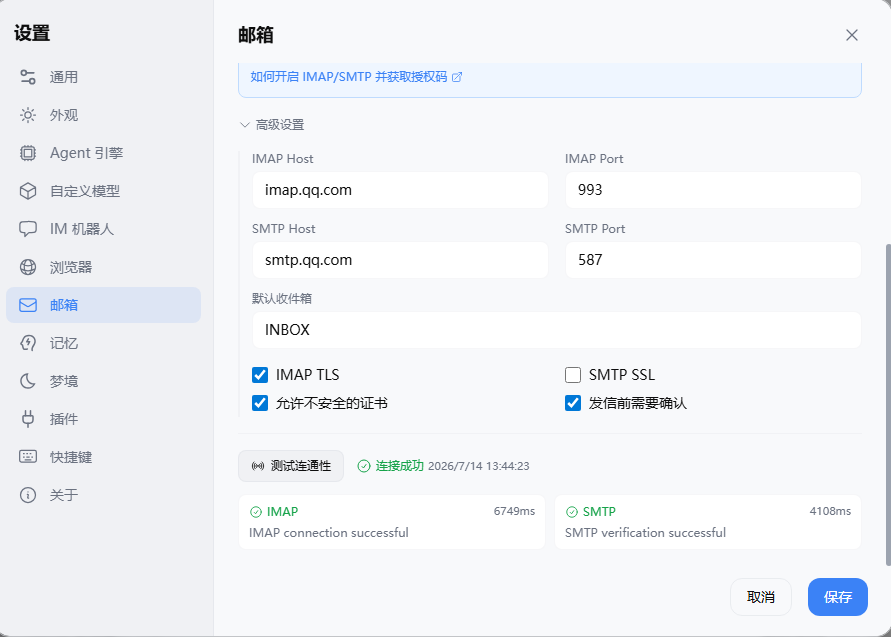
Expand Advanced settings, QQ Mail commonly uses:
- IMAP host:
imap.qq.com, port993, check IMAP TLS - SMTP host:
smtp.qq.com, port587 - Recommended to check Requires confirmation before sending(Review important emails manually first)
Then click Test connectivity. On success, it will display something like “Connection successful” and IMAP / SMTP verification passed.
Step 4: Save
Click the blue at the bottom right Save。
Return to the account list and confirm the toggle is on and the status is Enabled.
Step 5: After enabling the email skill, start using it
- Open in the sidebar Skills, confirm that email-related skills (such as
imap-smtp-email) are enabled - In the conversation, you can say: “Show me today's unread email summary” “Write a meeting confirmation email for someone”
How do I get an authorization code for other email providers?
- 163 / 126: Webmail → Settings → POP3/SMTP/IMAP → Enable service → Generate authorization code
- QQ: Enable IMAP/SMTP on the QQ Mail website → Generate an authorization code (the image above shows this process)
- Gmail: If two-step verification is enabled, use a Google “App Password”
- Company email: Choose “Custom” for the provider, and ask the administrator for the IMAP/SMTP host and port
Note
- Settings → Email is for sending and receiving emails;IM bot's channels are another type of feature; don't mix them up
- Leaking the authorization code equals leaking email access; do not send it to group chats or public repositories
Contact & Feedback
- Email:NiuClaw@binxinai.cn
- Community: https://www.bixinai.cn/NiuClaw/user_community/NiuClaw_user_community.html
- Manual: https://www.bixinai.cn/NiuClaw/user_guide/NiuClaw_user_manual.html